Topics for manage page banner:
- How to upload page banner
- How to add page banner text
- Arrange page banner display priority
- Remove page banner
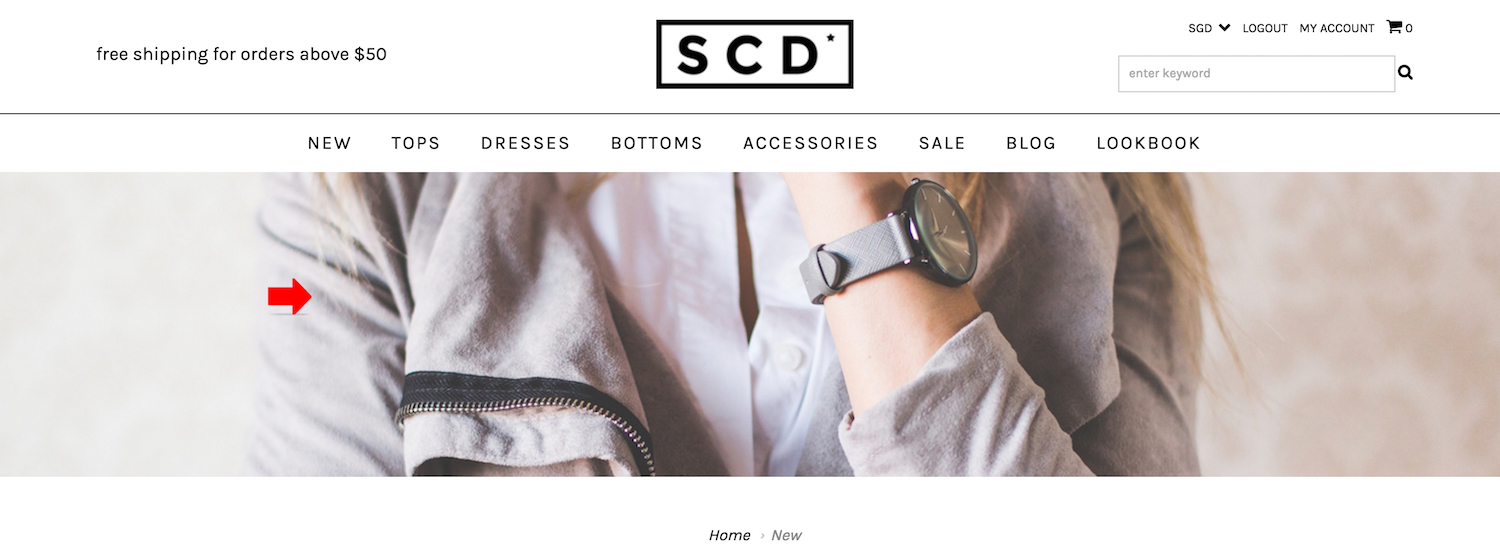
Page banners are page publish at the region below the web page header.
This is how a page banner looks like at the dresses listing page:
How To Upload Page Banner
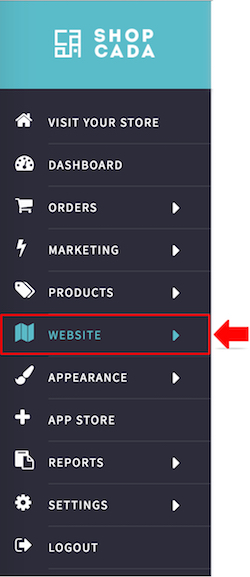
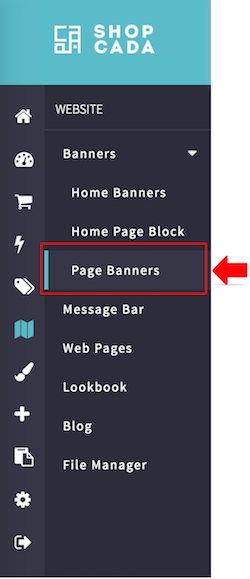
- From MANAGE YOUR STORE (DASHBOARD), go to WEBSITE then go to PAGE BANNERS
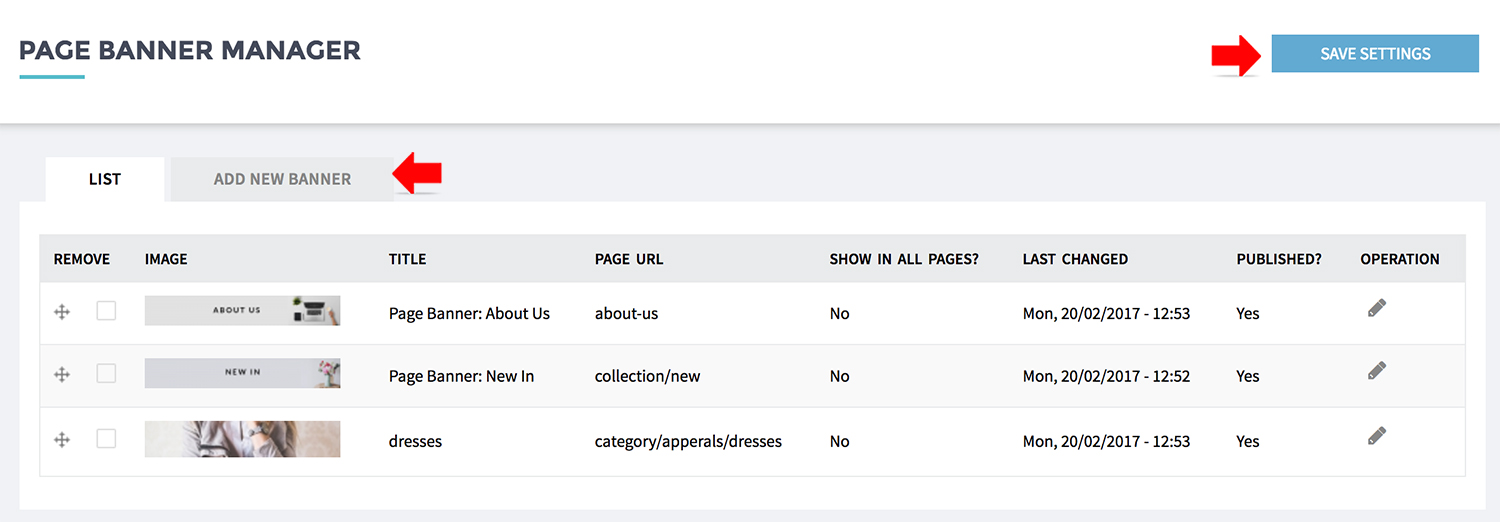
- Click [ADD NEW BANNER].
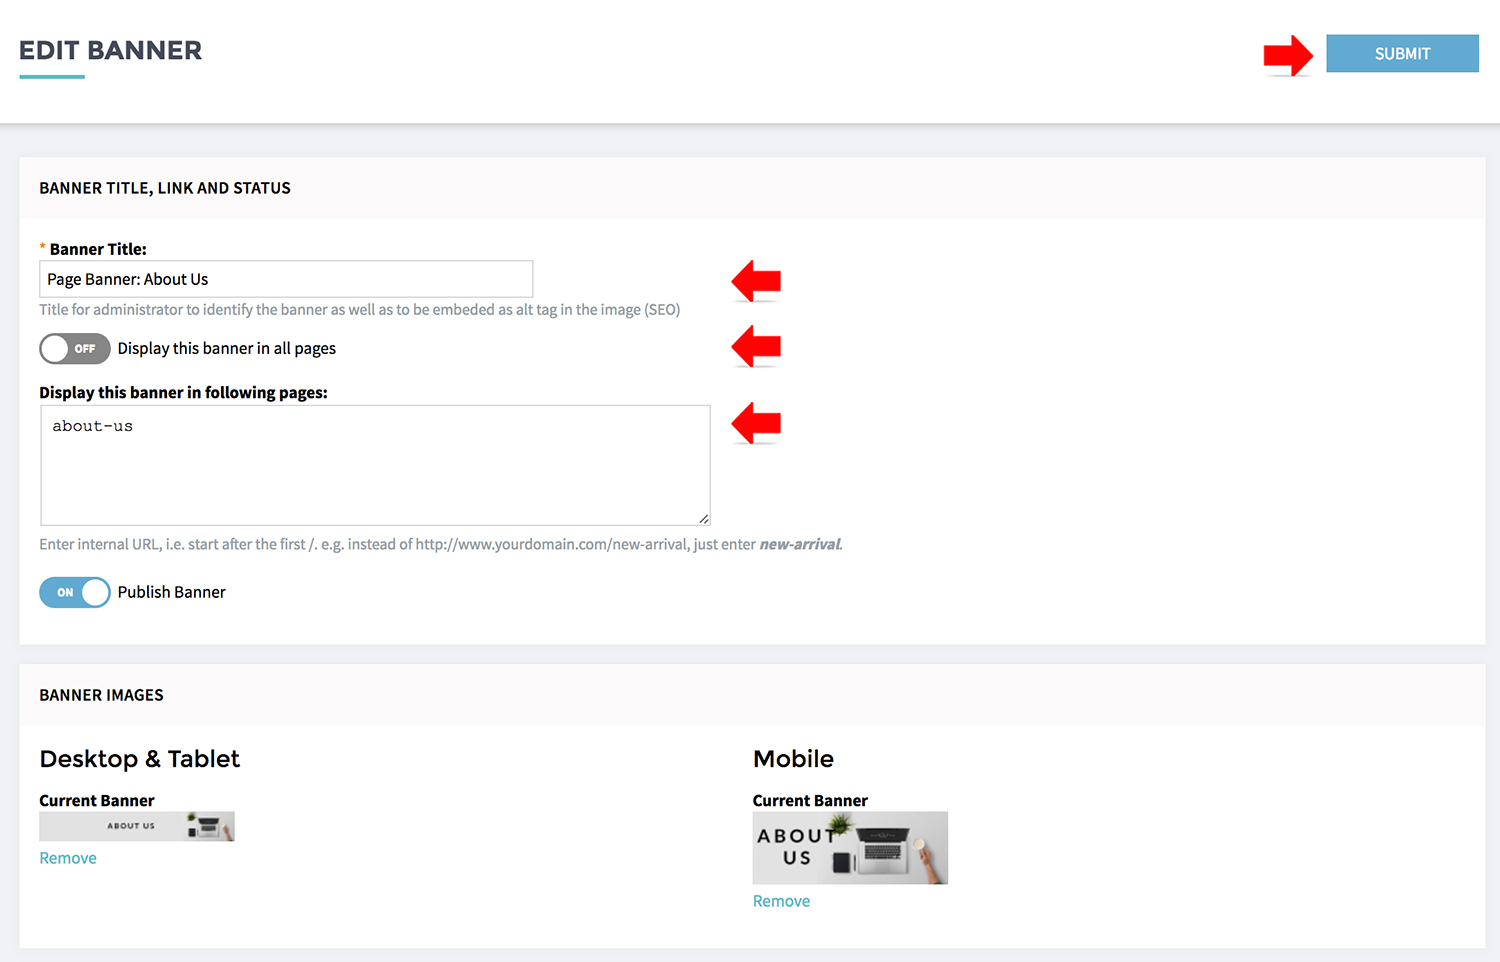
- Enter the [BANNER TITLE].
- Choose file to upload your new banner image. Only JPEG, PNG and GIF images are allowed.
Recommended size for
FULL WIDTH Banner is 1600 x 640px
STADARD Banner is 1200 x 640px
MOBILE Banner is 640 x 640 px
- Keep the check box for [DISPLAY THIS BANNER IN FOLLOWING PAGES] if the banner is for all pages.
- Enter the page URL at [DISPLAY THIS BANNER IN FOLLOWING PAGES].
- Turn on [PUBLISH BANNER] to publish the page to visitors.
Unpublished page will be kept in website but invisible to visitors. - Click [SUBMIT]. The new banner is ready.
How to add page banner text
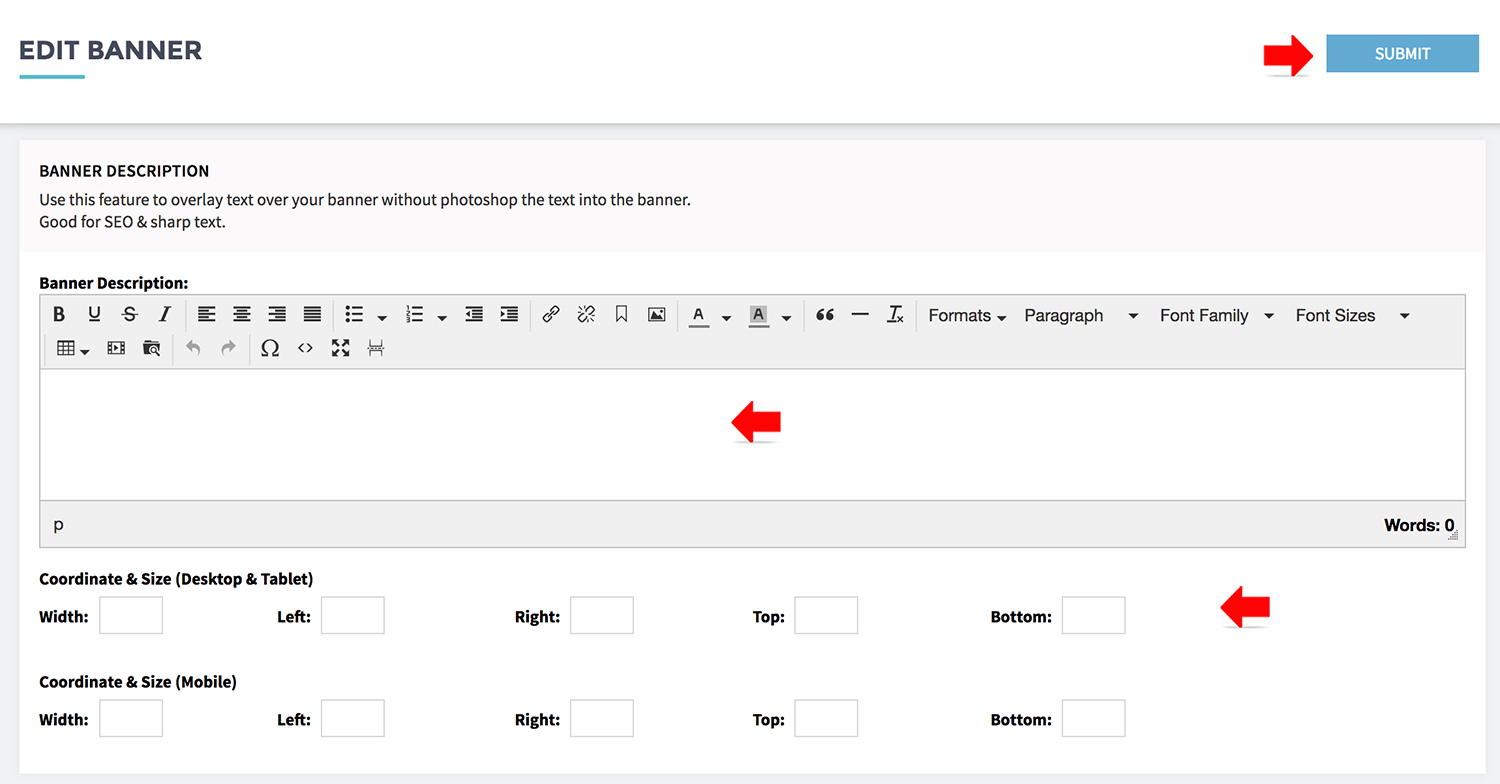
If you preferred overlay text over your banner without photoshop the text into the banner, you may enter the content to BANNER DESCRIPTION.
This is SEO friendly and text display will be sharp & clear.
This is SEO friendly and text display will be sharp & clear.
- Enter your promo message into the [BANNER DESCRIPTION]
- Use the [COORDINATE & SIZE] to control the text / paragraph placement on the banner.
More details on Coordinate and Size
Arrange banner display sequence
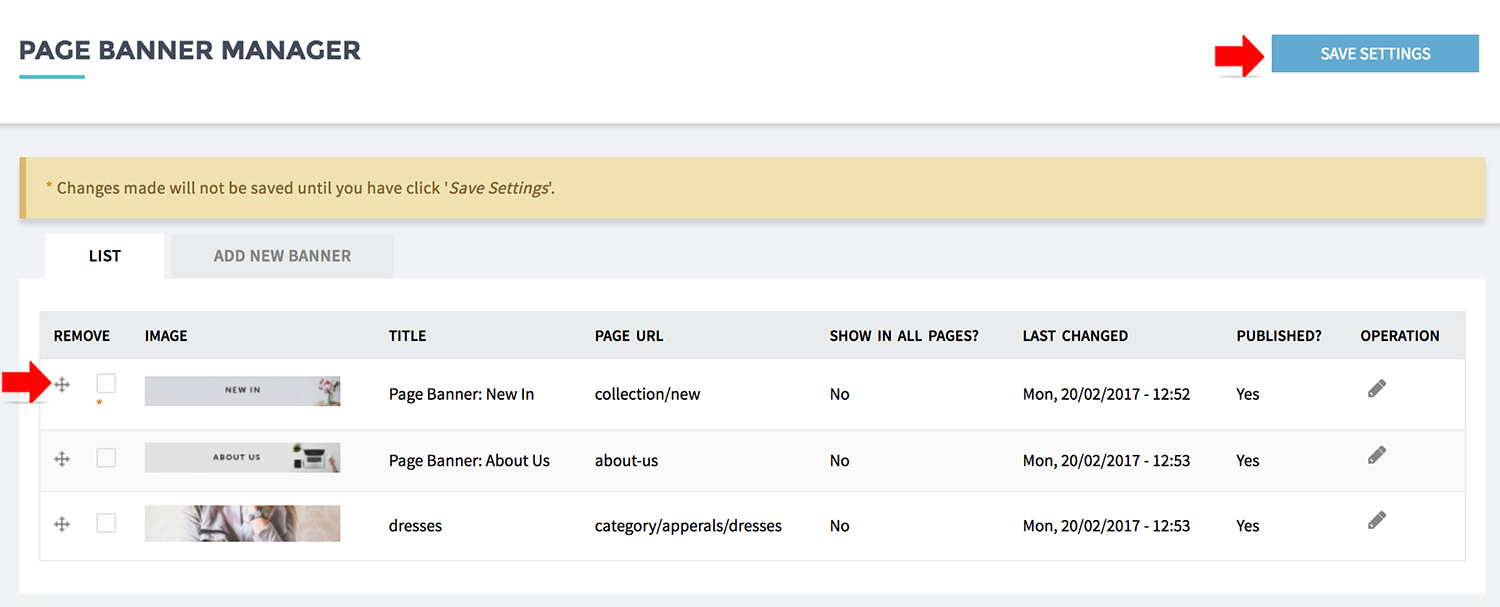
- From the banner listing page drag and drop the banners to the required position & form the preferred display sequence.
- Click [SAVE SETTING] to keep the changes.
Remove banner
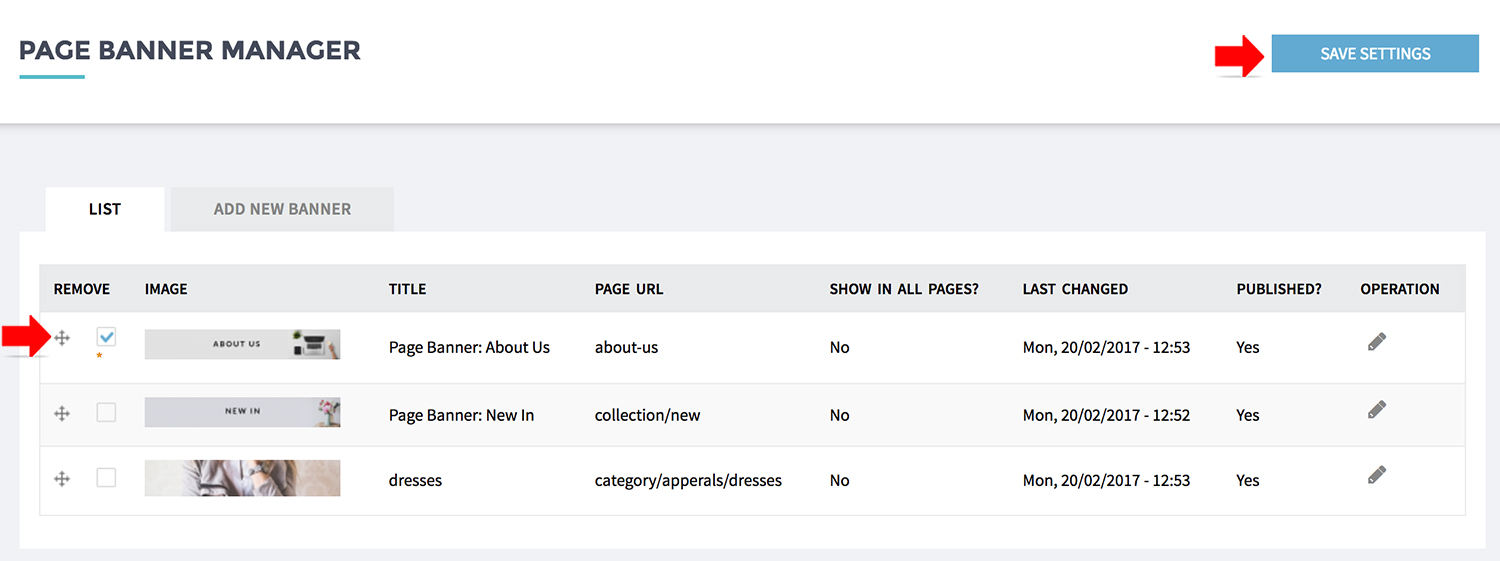
- Check the banner you wish to delete and click [SAVE SETTINGS].

